| Phase 1 of 3: Initial handling |
| |
This phase is performed by the company treasurer or bookkeeper. |
| |
 |
Gather all the documents related to a particular payment, as you normally would. These might be in paper or electronic format. Include any associated purchase orders, statements, bills, invoices or
receipts. Also include any authorizing or explanatory emails or memos. You're already doing all this in your current process.
|
| |
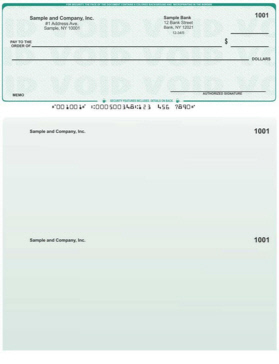
Voucher check-on-top checks
|
Note that with EfficiPay, you must use "voucher check-on-top" checks, as shown on the left.
These are widely available and offer extra value for both you and your payees. Make sure you've set up your bookkeeping program to print this kind of check.
From your bookkeeping program, print the check as you normally would.
|
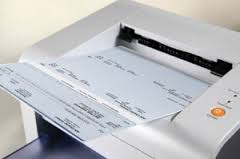
First imprint -- unsigned
|
| |

|
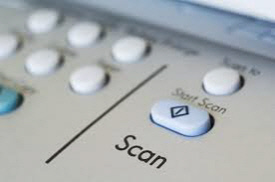
Scan the printed, unsigned check, and its associated supporting documents, in your document scanner. We recommend using monochrome settings to reduce file size.
Yeah, you need a document scanner. We like flatbed models, and those with automatic sheet feeders are wonderful. An all-in-one is perfect for this process.
Save the scan to your hard drive. You can scan the check and the documents into one file, or multiple ones. EfficiPay will support you either way, but it does have
a limit of 4 gigabytes per upload.
We recommend naming the scan that includes the unsigned check according to the check number. For instance, if this is for check #3409, the scan that includes that check should be named '3409.pdf', or similar.
|
 |
| |
 |
Log into EfficiPay and click the MANAGE DOCKETS link. |
| |
 |
Click Add docket. |
| |
 |
Enter the check number and click the Continue... button. |
| |
 |
Click the Browse... or Choose file button.
(This button's label depends on which browser you're using, but it will be near a paperclip icon.)
|
| |
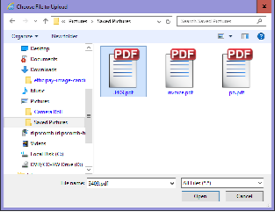 |
Select the file containing the scanned image of the unsigned check, and complete the dialog box. |
| |
 |
Click the <==Upload button. |
| |
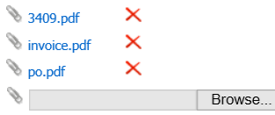 |
Repeat the previous two steps if you have other files to include in this docket as supporting documentation. |
| |
|
You've just created an EfficiPay docket -- an electronic collection that includes an unsigned check and any supporting documentation that the check signers should review.
|
| |
 |
Review your work.
If satisfied, check the Ready for review by signers box.
You've completed the initial handling phase!
|
| Phase 2 of 3: Signing phase |
| |
This phase is performed by the company check signers.
EfficiPay will notify the check signers by email that a check is ready to be reviewed and signed.
|
| |
|
Log into EfficiPay and click the MANAGE DOCKETS link. |
| |
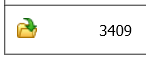 |
Click the yellow open folder icon to open a docket. |
| |
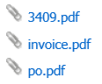 |
Click each of the docket content attachments and review them carefully, the same as you would if you were preparing to sign a check by hand.
Make sure the check number on the scanned check image matches the Check Number Of Record displayed on the efficipay_docket_detail page.
|
| |
 |
If you are satisfied, click the Sign check button.
When two check signers have done this, the signing phase is complete!
|
| Phase 3 of 3: Final imprint |
| |
This phase is performed by the company treasurer or bookkeeper.
EfficiPay will notify the treasurer and/or bookkeeper(s) by email when a check has been signed by two signers.
|
| |
|
Log into EfficiPay and click the MANAGE DOCKETS link. |
| |
|
Click the yellow open folder icon to open a docket. |
| |
|
Grab the paper unsigned check.
Make sure the paper check's number corresponds to the Check Number Of Record currently displayed by EfficiPay.
Load it into the printer in the same orientation as you did when you first printed it.
|
| |
 |
Click Print signature marks on check. |
| |
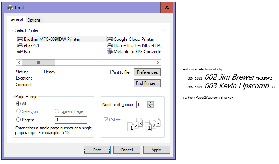 |
In a new browser tab, EfficiPay will prepare the final imprint containing the electronic signatures. Your browser's print dialog will also open. Make sure you've selected the right printer, then click the
Print button.
|
| |
|
The check that comes out of the printer will now have the required two signatures! |
| |
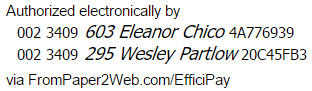 |
Here's a sample of the signature block that EfficiPay applies to the check. It includes a check series number ("002" in this example), the check number ("3409" in this example), the signers' EfficiPay
ID numbers, the signers' names, and verification hex codes. The hex codes provide assurance that the signature is only valid for the indicated check series, check number, and signer.
The signature block appears once on the check itself, and again on the bottom voucher.
Separately, EfficiPay provides a way for you, your vendors, or any auditors to verify the authenticity and applicability of these electronic signatures.
|
| |
 |
Close the browser tab that's displaying the final imprint.
If all went according to plan, you may now click Delete docket.
|
| |
|
EfficiPay does not archive the electronic docket.
File the paper check's bottom voucher and its supporting paper documentation in your physical archives.
|
| |
 |
Send the check to the payee.
You've completed the entire process!
|
| Ready? |
|